Setting up a home pottery studio does not require a dedicated room or a large budget — many working potters operate out of a corner of a garage, a basement, or even a covered outdoor space. The key is starting with what you actually need and building from there. This guide walks through what is essential, what can wait, and how to keep costs manageable.
Start With Your Practice
Before buying equipment, be honest about what you actually make. A wheel thrower needs different tools than a slipcaster or a handbuilder. Buy for your current practice — you can always add equipment as your work evolves.
Essential Equipment by Technique
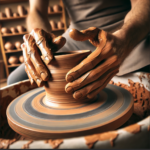
Wheel Throwing
- Pottery wheel — the main investment. New wheels range from $400–2000+. Used wheels in good condition can be found for significantly less. A Brent, Skutt, or Shimpo are reliable choices. Avoid very cheap no-name wheels — the motor and bearings wear out quickly.
- Bats — plastic or wooden discs that attach to the wheel head and let you remove thrown pieces without distorting them. Start with 5–10.
- Basic hand tools — wire tool, sponge, ribs, trimming tools, needle tool. A basic set costs $20–40.
Handbuilding
- Work surface — a canvas-covered board or wedging table works well. Canvas prevents clay from sticking.
- Rolling guides — two wooden slats of equal thickness to roll consistent slabs by hand if you do not have a slab roller.
- Basic hand tools — similar to wheel throwing tools.
Slipcasting
- Molds — either purchased or made yourself from plaster.
- Slip storage — 5-gallon buckets with spigots. See our Budget-Friendly Slip Bucket System guide.
- Drainage table — a PVC grid setup for draining molds. See our DIY Mini Slip Table guide.
The Kiln: Shared vs Own
A kiln is the biggest cost in a home studio — new electric kilns start around $1,500 and go up significantly. Before buying, consider using a community studio or firing service for your first year. Once you are producing work consistently and know what cone and size you need, buying makes more sense.
When you are ready, buy for the work you actually make — a small test kiln (around 7 cubic feet) is sufficient for most home studio potters making functional ware. Used kilns are widely available and often a great value if elements and brickwork are in good condition.
Space Requirements
- Work area — minimum 6×6 feet for a functional workspace. More is better.
- Clay storage — clay needs to be kept at stable temperature, away from freezing. A corner of a garage with insulation works.
- Drying area — pieces need slow, even drying away from direct sun and drafts. Shelves with plastic sheeting work well.
- Kiln placement — kilns need 12–18 inches clearance on all sides, proper ventilation, and a dedicated electrical circuit. Check your kiln specifications for electrical requirements before installation.
Budget Breakdown: Minimal Functional Setup
| Item | Budget Option | Approximate Cost |
|---|---|---|
| Pottery wheel | Used mid-range wheel | $300–600 |
| Basic tool set | Starter kit | $30–50 |
| Clay (25lbs) | Mid-fire stoneware or porcelain | $25–40 |
| Glazes (3–4 colors) | Commercial cone 6 glazes | $60–100 |
| Scale | Digital kitchen scale | $20–40 |
| Firing | Community studio or firing service | Variable |
For safety in your home studio, see Pottery Studio Safety: Dust, Chemicals, and What to Watch For. For ventilation, see Ventilation for a Home Pottery Studio.