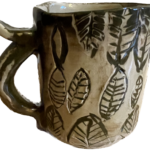
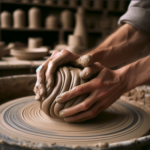
The coil and scrape method is one of the most traditional handbuilding approaches in ceramics — used worldwide for thousands of years and still the preferred technique for making large-scale vessels. You build walls with coils and then scrape the surface smooth with a rib or paddle, compressing and unifying the form as you go. The result is strong, dense ceramic walls with complete freedom over form.
Why Coil and Scrape?
Scraping the surface after coiling compresses the clay and aligns the clay particles, producing walls significantly stronger than those built by pinching alone. It is also the most scalable handbuilding technique — vessels 3, 4, and 5 feet tall have been built this way that would be impossible to throw on any wheel.
What You Need
- Grogged stoneware clay body — grog gives strength and reduces cracking during the slow drying required for large pieces
- Metal kidney rib — for scraping the outside
- Rubber kidney rib — for smoothing the inside
- Banding wheel or turntable — essential for anything larger than a small vessel
- Wooden paddle — for paddling and compressing the outside surface
- Scoring tool and joining slip
Step-by-Step: Coiled and Scraped Vessel
Step 1: Make a Slab Base
Roll a thick slab for the base and cut it to your intended base shape. Allow to firm to leather-hard on a bat. The base needs to be firm enough to support the weight of the walls as you build upward.
Pro Tip: Make the base slightly thicker than the intended wall thickness — it takes more weight and stress during building than the walls do.
Step 2: Add the First Ring of Coils
Score the edge of the base and apply joining slip. Lay a thick coil around the perimeter, pressing it firmly down into the base. Join the coil ends carefully where they meet — score, slip, and blend the join. For the first row on a curved base, use shorter coils to follow the shape precisely rather than one long continuous coil.
Pro Tip: The join between the base slab and the first coil ring is the most structurally vulnerable area of the piece. Score deeply, apply plenty of slip, and blend thoroughly from both inside and outside.
Step 3: Build Up 3–5 Coils
Score the top of each coil before adding the next. Apply slip. Press the new coil firmly down. Blend the inside join with your finger before adding the next coil. Build 3–5 coils before scraping.
Step 4: Scrape the Outside
Use a stiff metal kidney rib to scrape the outside surface in long smooth strokes from base to top. Apply firm, even pressure. The scraping motion compresses the clay and pulls the coil ridges into a unified wall surface. Rotate the piece on the banding wheel as you work, covering the full circumference.
Pro Tip: Scrape in one direction — downward strokes from top to base give the cleanest result. Long strokes covering more height in each pass produce a more unified surface than many short strokes.
Step 5: Smooth the Inside
After scraping the outside, use a rubber rib on the inside to smooth the interior surface and support the wall. The inside rib also helps maintain even wall thickness — if the outside scraping has thinned an area, the inside rib shows you where to add clay.
Step 6: Allow to Firm, Then Continue
For large vessels, allow the lower section to firm to soft leather-hard before continuing to build upward. Cover the top edge with plastic to keep it workable while the lower section stiffens. This is the most important step for large work — a tall soft wall will slump under its own weight.
Pro Tip: Build in stages of 4–6 inches of height, then stop and let it firm. Patience here is what makes the difference between a successful large vessel and a collapsed one.
Step 7: Repeat Until Full Height
Continue the cycle: add coils, blend inside, scrape outside, let firm, add coils. The form builds up gradually. At each stage you can adjust the diameter and profile by placing coils at different positions.
Step 8: Final Refining
Once the full height is achieved, do a final scraping pass on the outside to refine the profile. Use a Surform tool or coarse metal rib to remove any high spots and even out the wall. Paddle the outside gently with a wooden paddle to compress the surface and round out the form. Smooth the rim with a damp sponge or finger.
Pro Tip: Final paddling not only compresses the surface — it also corrects subtle irregularities in the form. Work around the full circumference systematically rather than just the areas that look rough.
Drying Large Coiled Pieces
Large coiled and scraped vessels need to dry very slowly — 2 to 4 weeks under loose plastic for a large floor vessel is not unusual. Rotate the piece regularly to ensure even drying from all sides. Any area that dries faster than the rest becomes the site of a crack. Never rush the drying of large handbuilt work.
For more on handbuilding, see Handbuilding Essentials and Pinch and Coil Combined.