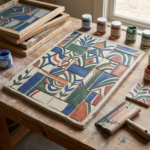
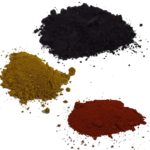
Underglaze is a ceramic colorant applied before the glaze layer. It fires stable and opaque under a clear or transparent glaze, which locks in the color and gives it a clean, ceramic surface. It’s one of the most controllable surface decoration tools available — the color you apply is close to the color you get after firing, which makes it more predictable than layering opaque glazes.
How Underglaze is Different from Glaze
Glaze melts fully in the kiln and forms a glass layer. Underglaze contains less flux, so it doesn’t fully melt on its own — it needs a clear glaze coat on top to seal it and give it a finished surface. Applied without a glaze coat, underglaze fires to a dry, matte surface that’s porous and not food-safe. Applied under a clear glaze, the color comes through and the surface is fully sealed.
When to Apply Underglaze
On Greenware (Leather-Hard or Bone Dry)
Applying underglaze to greenware gives the most matte, absorbed result and allows carving into the underglaze layer for sgraffito work. The underglaze soaks into the unfired clay. Greenware application requires care — the clay is fragile and damp brushwork can soften the surface.
On Bisqueware (Most Common)
Bisqueware is the standard stage for underglaze application. The fired clay is porous enough to absorb the underglaze but durable enough to handle without distorting. Colors apply cleanly, dry quickly, and can be layered. This is the most predictable and controllable stage to work on.
On Top of a Fired Glaze
Underglaze can be applied over a fired glaze layer and refired — called overglaze or china painting when done with fine colorants. Less common in studio pottery but used for adding fine detail to a finished glazed surface.
Application Methods
Brush
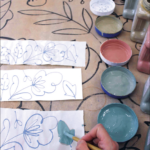
The most common method. Use soft-bristle brushes — fan brushes for large areas, detail brushes for fine lines. Apply in thin, even coats. Most underglazes need two to three coats for full opacity. Let each coat dry before the next. Single-coat application often fires patchy.
Sponge
A sea sponge or cut foam sponge creates texture and soft, irregular coverage. Good for backgrounds and organic effects. Dab rather than wipe — wiping smears and lifts the previous layer.
Stencil
Hold or tape a stencil against the bisqueware and apply underglaze with a stiff brush using a pouncing motion. See: How to Make and Use Stencils.
Underglaze Pencil or Crayon
For fine line work and detail. See: How to Make Ceramic Pencils and Crayons.
Transfers
Pre-printed underglaze designs applied to bisqueware. See: Underglaze Transfers and DIY Underglaze Transfers.
Applying a Clear Glaze Over Underglaze
Let the underglaze dry completely before applying a clear glaze coat. Dip, pour, or brush a transparent clear glaze over the decorated surface. The clear glaze should be applied at a normal coat thickness — no thicker. Too thick a clear coat can pool and distort the underglaze color underneath.
- Tip: Some underglazes bleed or move under certain clear glazes. Always test a new underglaze and clear glaze combination on a tile before using it on a finished piece.
Common Underglaze Mistakes
- Too few coats: One coat almost always fires patchy. Apply two to three coats for full opacity.
- Applying over a waxed surface: Underglaze won’t adhere to wax. Apply underglaze first, then wax over it if needed.
- Not testing new colors: Underglaze colors shift at different temperatures. Test on a tile at your target cone before applying to a finished piece.
- Skipping the clear coat: Without a glaze coat, underglaze is porous and not food-safe. Always seal with a clear or transparent glaze on functional ware.