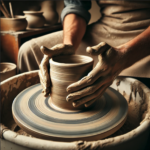
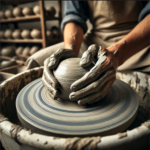
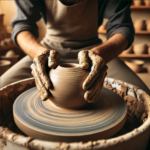
A well-thrown bowl is one of the most satisfying forms in ceramics — elegant, functional, and endlessly variable. Unlike a mug or cylinder where walls rise straight up, a bowl opens outward as it rises, which requires a different approach to opening and shaping. This step-by-step guide takes you from centering to a finished bowl ready for trimming.
How Much Clay?
| Bowl Size (fired diameter) | Clay Weight |
|---|---|
| 4–5 inch (rice bowl) | 8–12 oz |
| 6–7 inch (cereal bowl) | 1–1.5 lbs |
| 8–9 inch (serving bowl) | 2–3 lbs |
| 10–12 inch (large serving) | 3–5 lbs |
Step-by-Step: Throwing a Bowl
Step 1: Weigh and Wedge Your Clay
Weigh your clay to your chosen weight and wedge thoroughly using the ram’s head or spiral wedging method. Consistent clay weight is the foundation of consistent bowls. For more on wedging see our Spiral Wedging and Ram’s Head Wedging guides.
Step 2: Center into a Low Wide Dome
Set the wheel to 3/4 speed and slam the clay onto the center of the wheel head or bat. Center the clay into a low, wide dome rather than the tall cone you would use for a mug. Bowls are wide and open — you want the mass distributed horizontally from the start.
Pro Tip: If your centered mass looks like a mushroom — wide and flat on top — you are in the right shape to open a bowl. A tall narrow cone is the starting shape for cylinders, not bowls.
Step 3: Open Wide and Outward
Place your fingers at the center of the clay and press down, then push outward — you are opening the floor of the bowl wide, not boring deep like a cylinder. Work in two or three passes to open to your target diameter. Leave the base about 3/4 inch thick — you will trim this for the foot ring.
Pro Tip: Think of opening a bowl like pushing the clay into a wide, shallow disc rather than drilling straight down. The direction of pressure is outward, not downward.
Step 4: Compress the Base
Before pulling the walls, use a rib to compress the base floor with smooth circular passes from center to rim. This prevents S-cracks from forming during drying. At least two full passes.
Step 5: Pull the Walls Outward and Upward
Bowl walls rise and flare outward simultaneously. With each pull, allow your inside hand to move outward slightly as it rises — let the wall flare naturally. Your outside hand guides and controls the flare rather than fighting against it. Think of drawing the wall outward and upward in a smooth curve.
Pro Tip: Do not fight the outward movement of the clay. Bowls want to open — work with the centrifugal force rather than against it. Your job is to guide and control the opening, not resist it.
Step 6: Refine the Profile
Use a curved rib held against the outside of the bowl while your inside hand supports the wall. Move the rib from the base to the rim in a smooth arc to refine the profile curve and remove excess water. The shape of the rib determines the shape of the bowl wall — use different ribs for different profiles.
Pro Tip: A rubber rib gives a smoother, more organic curve. A metal rib gives a crisper, more defined profile. Try both and see which suits your aesthetic.
Step 7: Refine the Rim
Slow the wheel to a gentle speed. Use a damp sponge or your fingers to smooth and level the rim. A bowl rim can be left flat, rolled slightly inward for a contained opening, or opened outward for a wide, inviting form. Keep the rim consistent in thickness around the entire circumference.
Step 8: Compress and Finish
Do a final compressing pass with a rib on the outside of the bowl to consolidate the clay surface and remove any water sitting in the wall. Cut the base with a wire tool and allow to firm to leather-hard on the bat before trimming.
Bowl Profile Variations
- Hemisphere — a clean half-circle. Classic and versatile. Even curvature from base to rim.
- Flared — walls that accelerate outward toward the rim. Dynamic and open feeling.
- Inward curve — walls that curve slightly inward at the rim. Good for soups — contains the opening.
- Straight sided — steep walls with minimal flare. Between a bowl and a cylinder. Good for ramen bowls.
Trimming
Bowls need to be trimmed at leather-hard to create the foot ring and refine the base profile. For foot ring styles and trimming technique see our How to Trim Pottery guide.
For more on wheel throwing, see Wheel Throwing Essentials and How to Throw a Platter.